Enabling WAF on AWS Lightsail via CloudFront and EC2
Setting up WAF to protect Lightsail instances is a little awkward. From a technical standpoint, Lightsail uses its own internal VPC, so WAF is not normally able to be used on it.
What you need to do is make a CloudFront distribution that will act as the entry point for your website, and then use WAF on that. The method to do this is below.
Create an Application Load Balancer
This is an important step, because Lightsail Load Balancers are limited in functionality that allows us to secure this configuration; we need to be able to restrict traffic to the load balancer to only be allowed to come from CloudFront, and we cannot do with that a standard Lightsail Load Balancer.
Creating a Target Group
In the EC2 Console, go to Target Groups in the left panel (it's near the bottom, in the Load Balancing subsection). We need to define a target group containing the private IP addresses of the Lightsail instances the load balancer will direct traffic to.
Click the Create a target group button, and on the first page, you'll have some options.
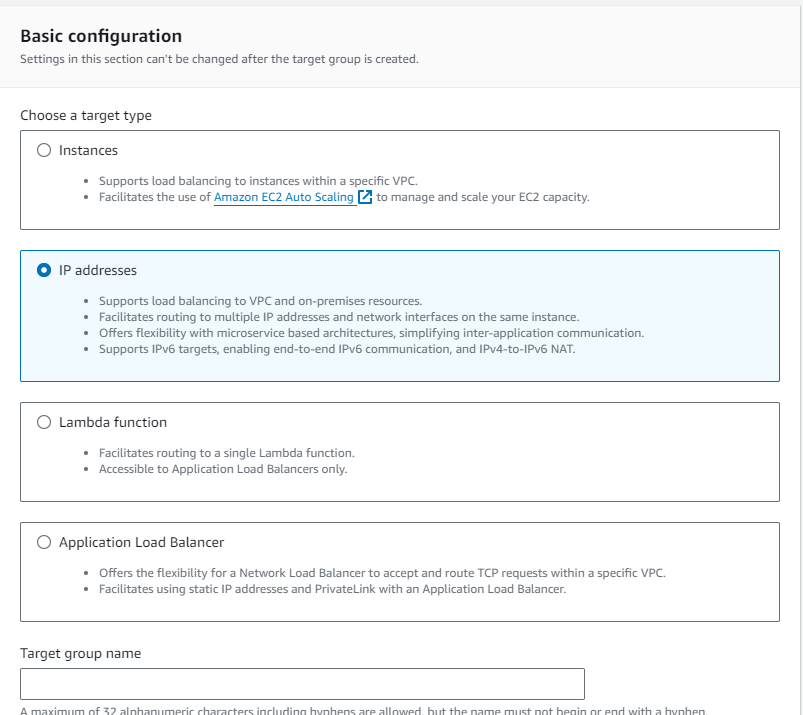
Select IP addresses as the target type, and make sure that the protocol is HTTPS. Continue on to the next page of configuration options. In "Choose a network", note that you can choose "Other Private IP Address", which is what we need to do.
Lightsail instances are not in your default VPC - they are in their own internal VPC you don't have direct control over, so you won't be able to add their IP addresses here without using the Other Private IP Address option.
Add their private IP addresses (not the public, static IPs you've assigned to them), and click Include as pending below. You don't need to wait for the health check to run; continue to finish creating the target group.
Creating a security group for your Application Load Balancer
If you don't already have one, you will need to create a new security group for your load balancer; unlike your default security group, you need the load balancer to be in a fairly restrictive security group that only allows CloudFront IP addresses to access it.
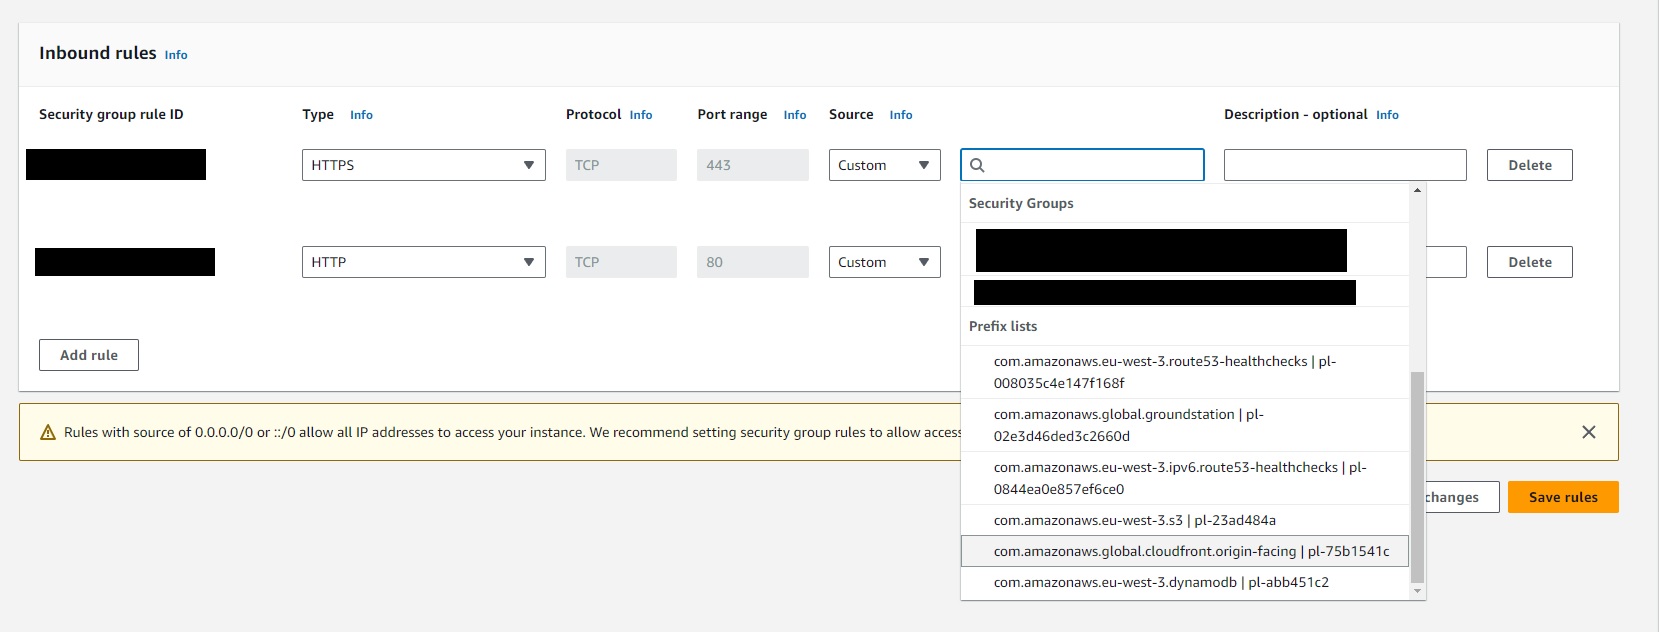
Once you have your increased quota, go to the VPC Console and select Security Groups from the left menu. Create a security group that has only one inbound rule, for HTTPS. When specifying the Source, scroll down to the bottom of the list of suggestions to the Prefix List and select the one for CloudFront.
Creating the Application Load Balancer
In the EC2 Console, under the Load Balancing subsection, click on Load Balancers and then Create a new load balancer.
Select Application Load Balancer as the type you want. Select the Internet-facing option, and make sure to include all the availability zones for your VPC.
In Listeners and Routing, make sure the protocol is HTTPS, and select the Target Group you created earlier as the group to forward requests to. The last thing to do is to create an ACM certificate for the load balancer to use, if you do not already have one (your CloudFront one won't work unless your load balancer happens to be in the US-East-1 region).
Finish creating the load balancer. At this point, we are not yet finished; there are some extra changes we need to make that aren't available to do in the creation stage. In the Listeners and rules section in the details page of your new load balancer, click the HTTPS listener to go to its details page. Firstly, we need to create a new rule, specifying HTTP header as the condition.
Decide on any header name and value you want, but these need to be kept secret. Something like X-Your-Custom-Header: 'your custom value'; this will be used to check if a request to the load balancer came from CloudFront or not.
Secondly, we need to modify the default rule for the listener. Set its action to "Fixed response", making the response code 403. You can choose how to format the error message that's displayed to your liking. Save and the load balancer is finished.
Create a CloudFront Distribution
In the CloudFront console, create a new distribution. Set the origin domain to the DNS name for your load balancer, shown in its details page. Use HTTPS for connections, with normal caching behaviour.
Be aware that for test environments, you might want to disable caching: if things like JavaScript files are being served by the webserver and not your CDN, then changes to scripts and other content going through the CDN distribution might not update while the cached version persists, which can be confusing when testing stuff.
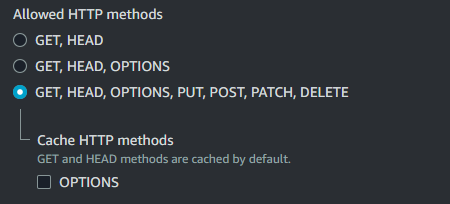
Make sure to set the allowed HTTP methods to allow more than just GET and HEAD! Since all traffic to your site will be going through this CDN, a lot of requests (namely POST requests) will fail if you do not set this correctly.
Set your domain name to resolve to the distribution
In your DNS provider, you'll need to create a CNAME record that links yourwebsite.com to the address of your distribution, so that going to your website sends people to the distribution you just created. This is different to the normal setup, where normally this CNAME record would point to your load balancer's IP address.
Make sure not to include the https:// in the CNAME record's value for the distribution; just the "whatever.cloudfront.net".
Set up WAF on the distribution
The CloudFront console has fairly primitive WAF options; it's better to go into the AWS WAF console and set up your rules there.
In the WAF console, go to Web ACLs in the left panel, and select the Global (CloudFront) region. Click the create web ACL button. Select Amazon CloudFront Distributions as the resource type, and add the distribution you created in the Associated AWS Resources panel at the bottom.
On the next page, you can add rule groups that the WAF will use to screen incoming requests. The AWS WAF system has a measurement called Web ACL capacity units (WCUs) that basically show how many rules you can add to a particular ACL. Some managed rule groups take up more capacity than others.
Note that although the WCU limit is 5000 per ACL, having more than 1500 incurs extra costs.
In the top right dropdown, select Add Managed Rule Groups (i.e. those maintained by AWS, and those that are maintained by other companies and offered by AWS). Open up the AWS managed rule groups section.
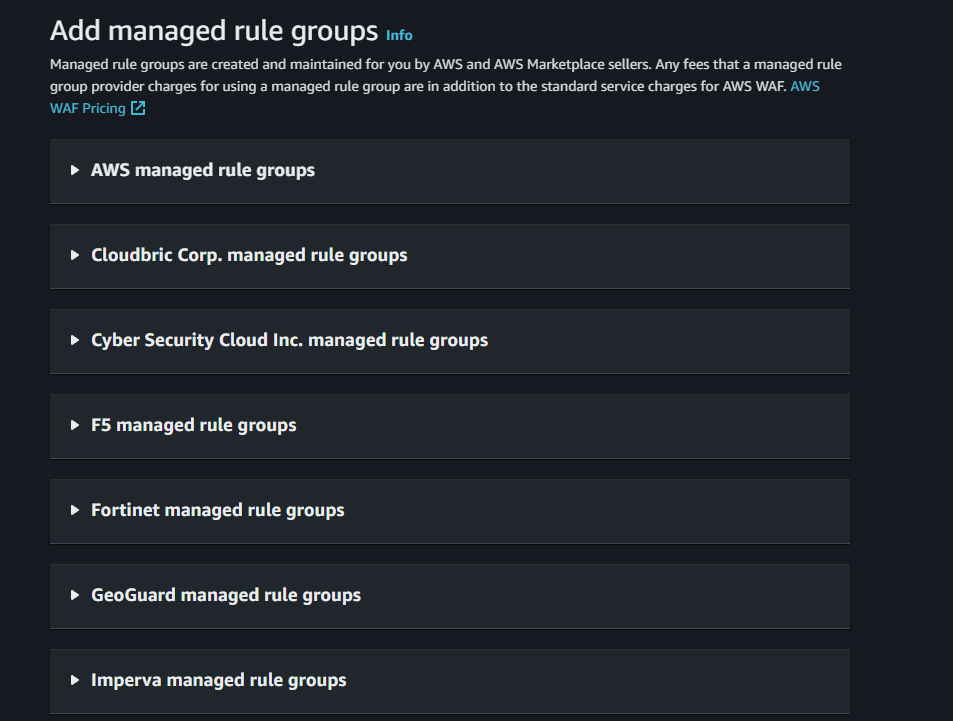
The non-AWS rule groups all require paid subscriptions; a few of the AWS ones incur extra charges beyond the normal $1/month per associated ACL, but many do not. Inside the AWS managed rule groups section, scroll down to the Free rule groups.
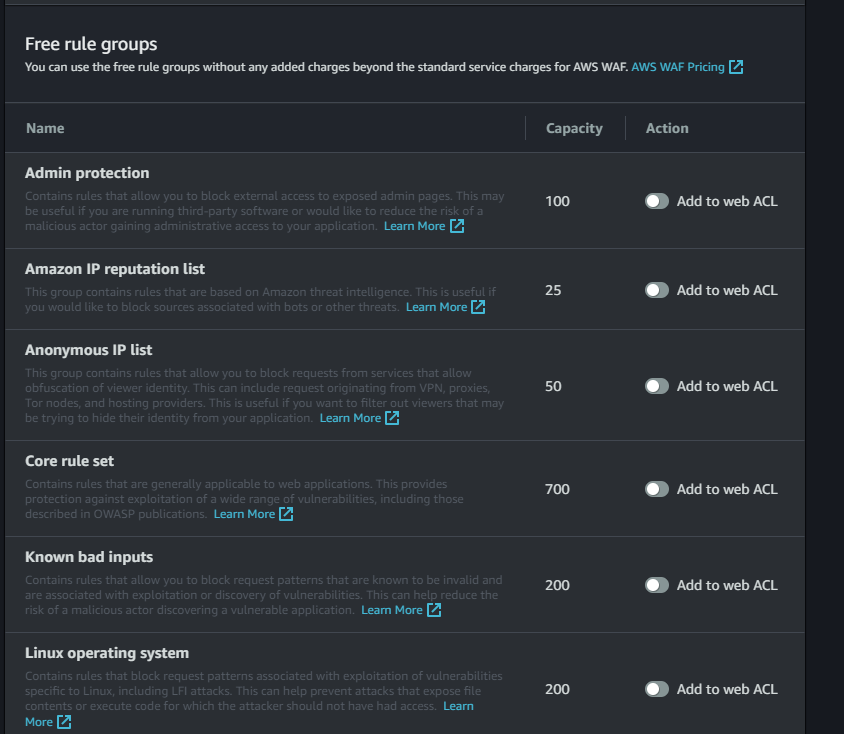
There's more than shown on this screenshot, but this group is where most of the rule groups you want reside (thankfully, since they're not subject to extra charges). You should be able to add the rule groups you need without exceeding the 1500 WCU limit - here are some of the important ones:
- Core rule set (700 WCU)
- Amazon IP reputation list (25 WCU)
- Known bad inputs (200 WCU)
- Linux or Windows operating system, as appropriate (200 WCU)
- SQL database (200 WCU)
- PHP application, if appropriate (100 WCU)
This puts your web ACL at 1325-1425 WCU, depending on if you needed the PHP application rule set.
Complete the WAF setup, and now your website is behind the CloudFront distribution and protected by WAF - but we have a couple of final things to do.
Configure overrides for WAF rule sets
The managed rule sets for WAF are intended to defend against the most common threats, and are thus made in a very one-size-fits-all way. Some of these rules may block things you don't want them to block.
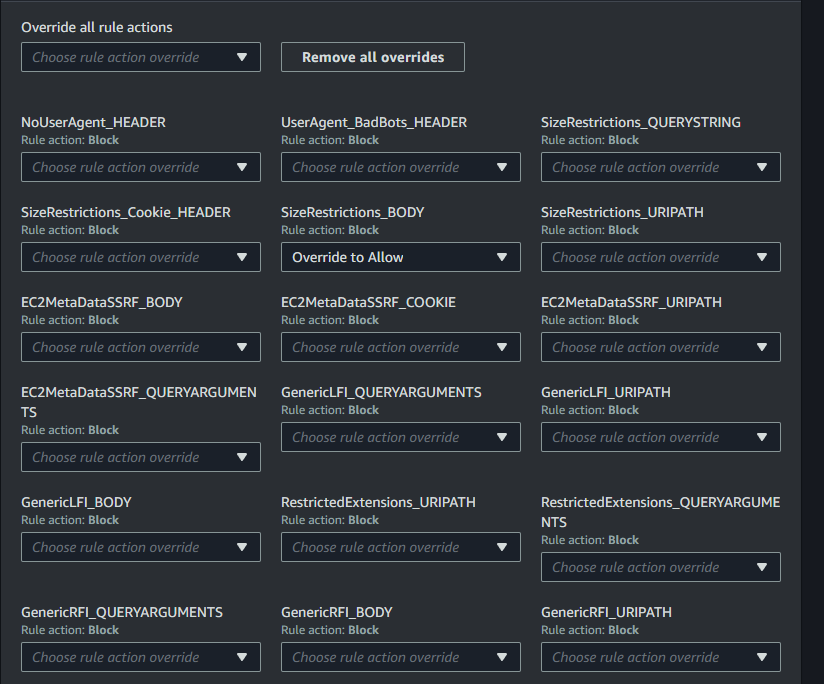
If your site lets users upload files, you will likely need to override one of the rules in the Core rule set, which blocks any request with a body exceeding 8KB in size (as uploads can get blocked by this).
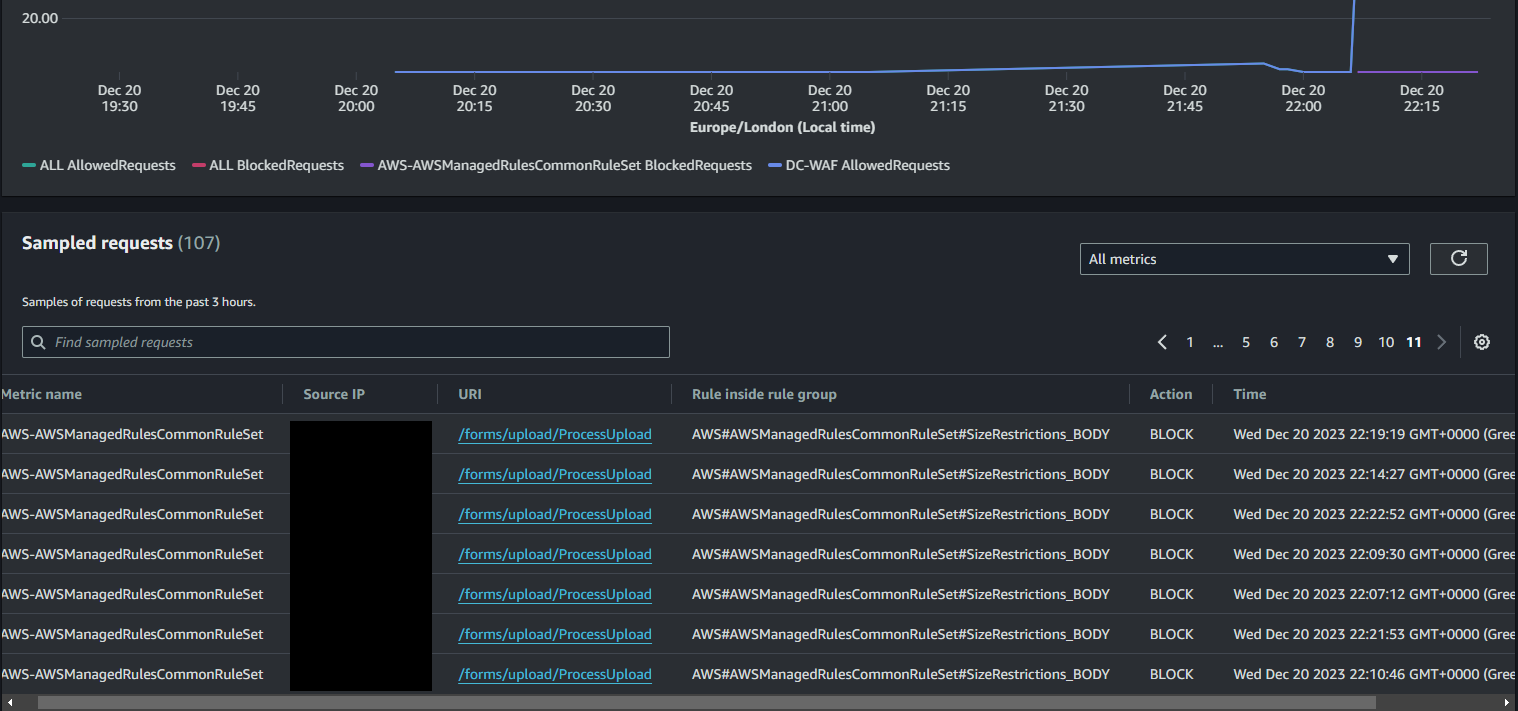
To fix this, go into the details area of your WAF ACL, go to the Rules tab, and edit the AWSManagedRulesCommonRuleSet. Modify the override behaviour for the SizeRestrictions_BODY rule to Allow:
Remove public access to Lightsail instances
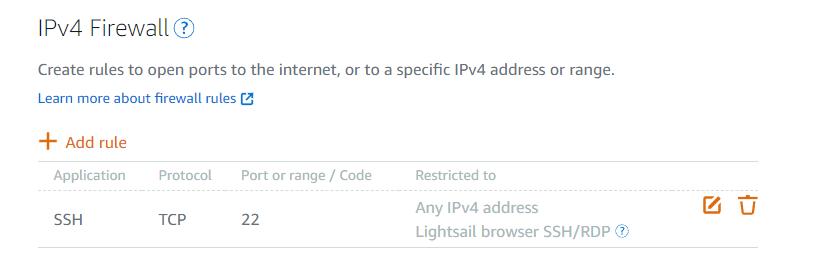
Since your Lightsail webservers are now only ever accessed from your CloudFront -> Load Balancer setup, you can remove the default firewall rules in the Lightsail console that allow incoming public HTTP and HTTPS connections. Normally the IPv4 Firewall in the console for a given server instance looks like this:
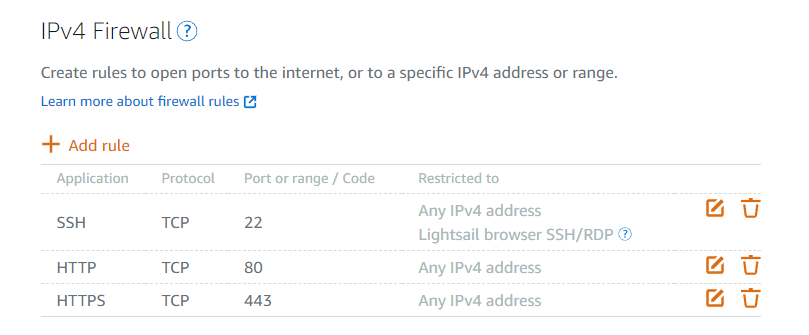
Use the trash icon to remove both rules entirely, leaving only SSH (and if you want, limit your SSH access to some group of IP addresses for further security).